 Trade Zone
How to Lay a Concrete Driveway
Laying a driveway is one of the most popular uses for ready mix concrete. Properly done, a finished concrete driveway will be attractive, strong and long-lasting, but getting to that point will take a fair bit of preparation and patience.
To help you get the best results, we’ve put together this step-by-step guide on how to lay a concrete driveway.
Need concrete for your project?
Call Total Concrete on 0800 859 5371 to get a quote, or use our online booking form.

Planning permission
Before you get in touch with Total Concrete to place your order, you’ll need to crack on with planning. If you’re going to use porous concrete, you won’t need to gain planning permission before starting work. However, if you use a non-porous mix, it’s likely that you will need planning permission. If you need advice on the most suitable concrete mix for a driveway, with the goal of avoiding planning permission, then contact Total Concrete and our team will be happy to help.
Dimensions and sub-base
Settle on the dimensions of your driveway early on. This will directly inform how much concrete you need to order, so changing dimensions at the last minute will compromise the strength and functionality of your driveway. Once you’ve settled on the size and shape, ensure that you have a solid sub-base in place — well compacted hardcore at least 100mm deep is recommended.
Ordering your concrete
For DIY jobs, it’s important to arrange everything in advance so you have stable deadlines to work with. Once you know how much concrete you need, get in touch with Total Concrete to arrange your order and discuss the right mix for your needs. By telling us about your project, we can help you arrange a delivery slot to suit your schedule — you should leave yourself enough time to get the initial ground preparation work done before your concrete arrives.
How to Lay a Concrete Driveway
Checkout our 12 step guide on how to lay a concrete driveway.
Step one: Layout the perimeter of your driveway with wooden stakes

Once the shape and dimensions are settled, outline the perimeter of your driveway with wooden stakes. Drive these into the ground at regular intervals, ensuring the final outline matches your planned length and width.
Step two: Add wooden forms
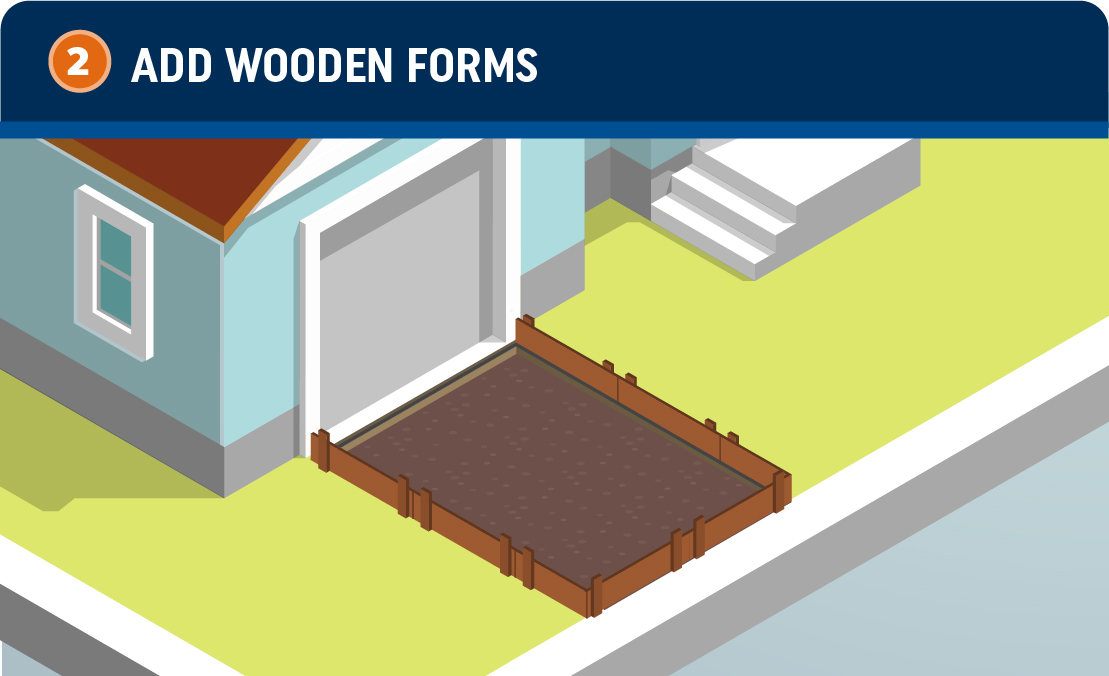
Use sturdy wooden planks to create a solid, temporary housing for the driveway. Forms will keep the concrete in place while it is poured. You need these forms to be anchored so they are consistently straight and aligned.
Step three: Dig out topsoil and level out the driveway sub-base
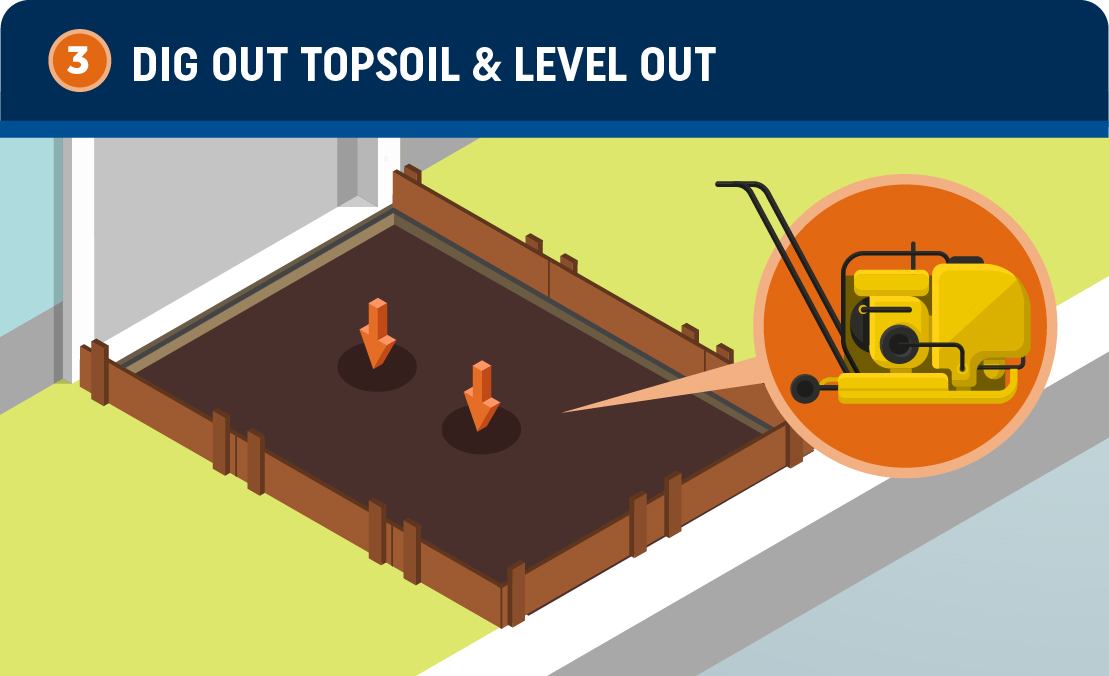
A solid, level foundation is essential, so dig out the top level to your required depth. If the sub-base is not suitable here, dig another four inches and add your hardcore. This will need to be compacted, which may require the hire of a plate compactor. Having this layer firmly compacted and level across your planned pour site will form a solid foundation upon which your concrete can be poured.
Step four: Reinforcing the concrete (optional)
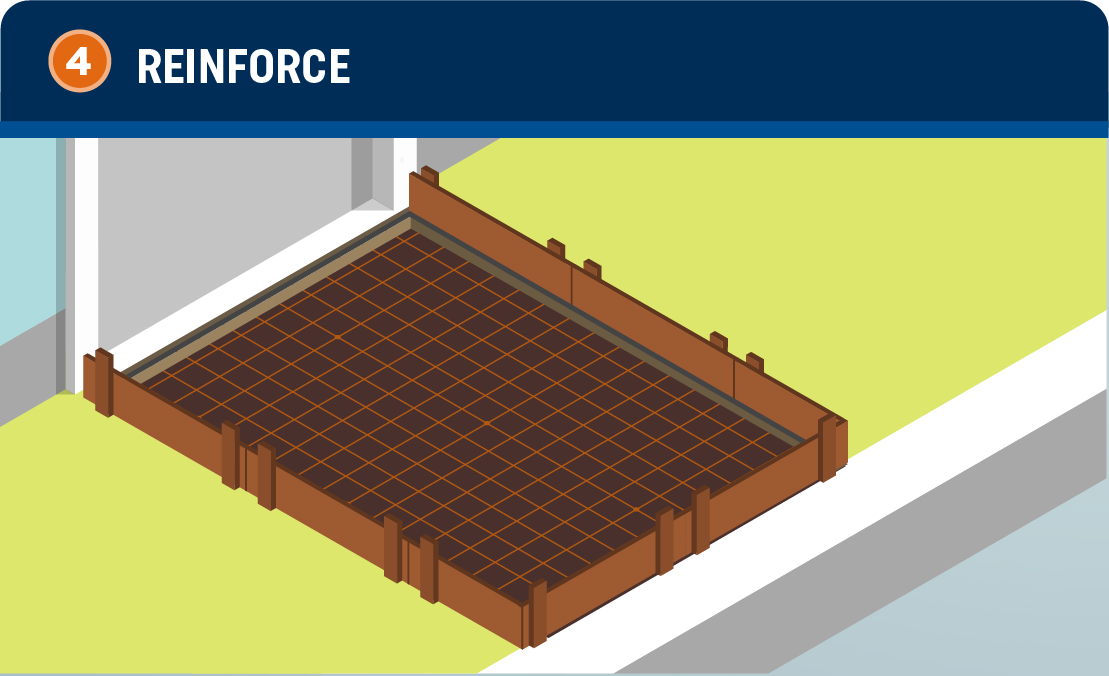
If needed, you can reinforce your driveway with steel so that it is fundamentally stronger, enabling it to handle heavier loads with ease. To do this, install reinforcing steel rebars in a grid pattern over your pour site. You can buy a dedicated concrete wire mesh for this purpose. Reinforcing your concrete with steel mesh will help to distribute the weight of your vehicles more evenly, drastically improving its strength. While this step is optional, it is still highly recommended.
Step five: Pouring the concrete

With the sub-base and perimeter all set up, you just need to wait for the concrete to arrive. Ready mix concrete should be poured as soon as possible after reaching your worksite. If, for whatever reason, you need to hire a concrete pump to pour your concrete, the Total Concrete team can arrange this for you. If this isn’t necessary, you should be able to pour the concrete into your forms directly from the drum mixer.
Pour the concrete in even loads. As it is poured, you can distribute the concrete using a hoe, keeping the concrete relatively flat and slightly higher than the top of the forms.
Looking for high-quality, affordable concrete for your driveway? Get in touch today.
ContactStep six: Flatten and smooth out the surface
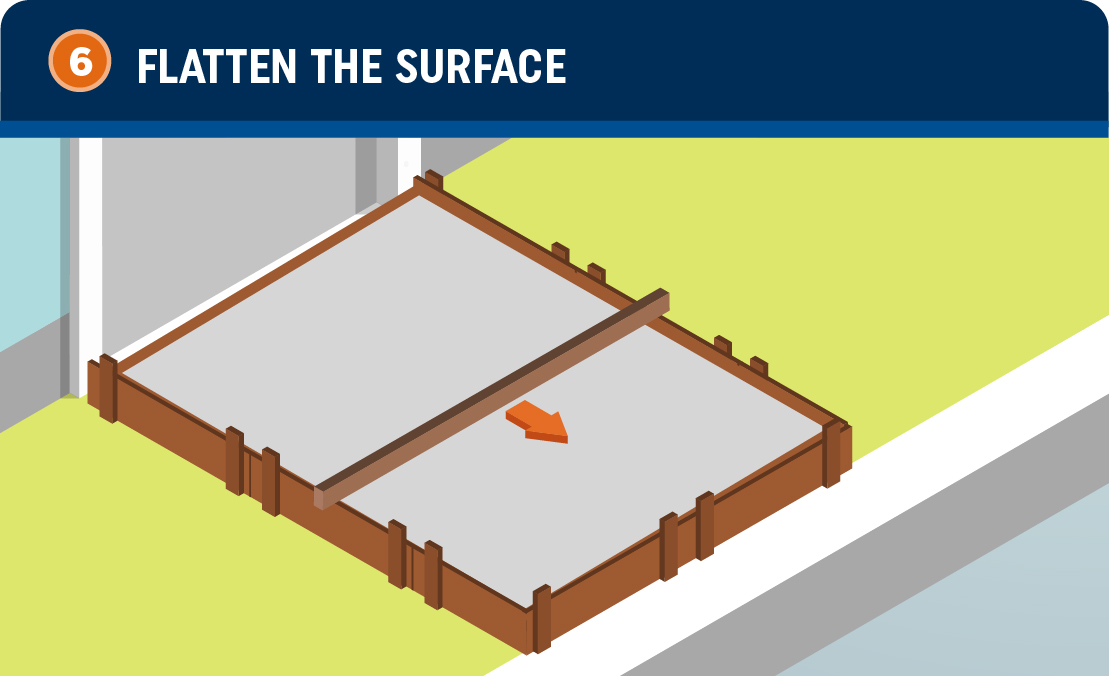
Once all the concrete has been poured, it needs to be flattened to create a consistent, smooth surface. Start by removing excess concrete so the final slab is level with the forms. To do this, use a straight, timber 2×4. Starting from one end of the driveway, placing the timber horizontally across the slab, move it back and forth in a steady sawing motion to flatten out the concrete as you go. Use any excess concrete to fill in shallow areas as you go.
Next, use a concrete float to smooth out the surface. Start out at one end, placing your float against a horizontal form, and use a smooth arching motion to smooth out the flattened surface. Progress steadily across the driveway until the surface is clean and consistently smooth.
Step seven: Cut in contraction joints

Using a concrete grooving tool, you now need to cut control joints. For a driveway four inches deep, cut these joints every four feet or so — ensuring they are evenly spaced. These joints should be about 1 inch deep, and cut along the width of the driveway. Contraction joints help to control expansion and contraction of the slab as it dried.
Step eight: Create a non-slip finish
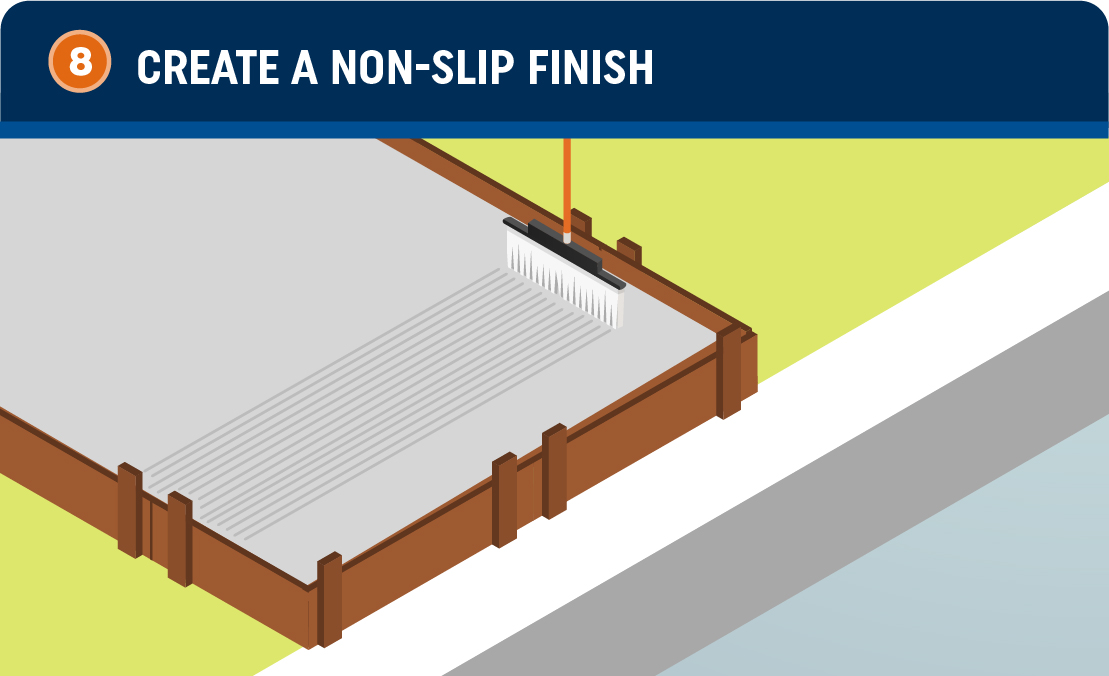
To aid traction for your vehicle, use a thick-bristled broom to create a non-slip finish. Simply run the broom across your driveway, evenly, from one side to the other. Repeat this action until the entire driveway, making sure you stick to one direction for every stroke.
Step nine: Curing
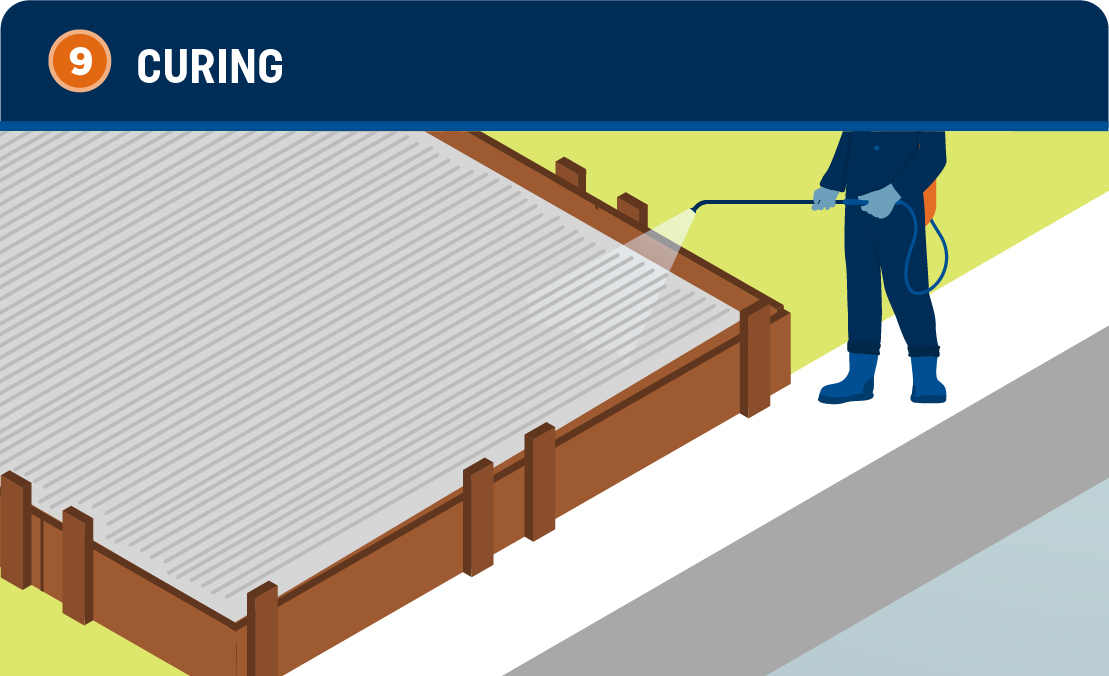
The concrete needs to be cured for a period of time before it is ready to take the weight of your car. The driveway should be water cured for around 7-10 days after the concrete has been laid. This can be done by creating a moisture-retaining barrier, which can include regular sprinkling, laying down wet curing blankets or a layer of plastic sheeting.
Step ten: Remove the forms

You should be okay to remove the concrete forms once curing has begun and the slab has hardened. Take your time and carefully remove the stakes first, then remove the forms one at a time. Be careful when removing the forms as the concrete won’t be fully cured. Just take your time and use common sense to safely remove the forms bit by bit.
Step eleven: Edge the concrete
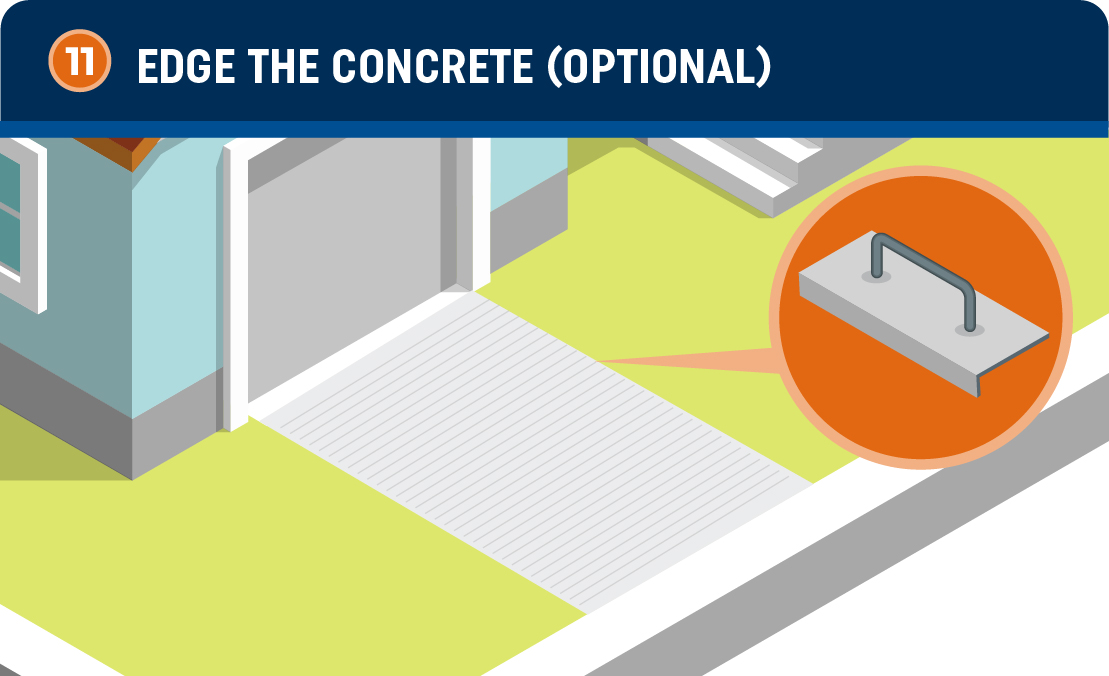
This optional step can create a smooth finish on the edges of the driveway. You’ll need to use an edging tool, working from one end of the driveway to the other. Make sure that you keep the front or back of the tool slightly raised, so you’re not pressing the concrete down. Use a smooth motion along the edge of the slab to shape it. If moving the tool forwards, keep the front raised, and vice versa.
Step twelve: Using your driveway

Usually, concrete won’t reach its full curing strength until 28 days after pouring. You should be able to walk on the concrete after two days, but it’s best to refrain from parking on your driveway until the 28 day mark.
Total Concrete provide domestic driveway concrete throughout the Surrey, Guildford, Woking and beyond. We Ensure a prompt, reliable service and our expert team can provide all the advice and assistance you need to ensure you have the right type and right amount of concrete for your DIY driveway build.
For more information, simply contact us today.
Call us on 0800 859 5371 to get a quote, or use our online booking form.